Volumes in Genostack
Volumes in Genostack serve two main purposes: The first one is storage, and the second is instance booting.
Quota
You are allocated 100 Go , divided into up to 10 volumes. This quota is shared between storage and host volumes.
Using volumes for storage
Overview
If you need to increase the space available on one of your instance, one of the possibility is to attach a volume on it. Created volumes can be attached and detached from instances at will, allowing you to transfer data between several of your instances. You can also transfer one of your volume to another user to share data with him.
Creating a new volume
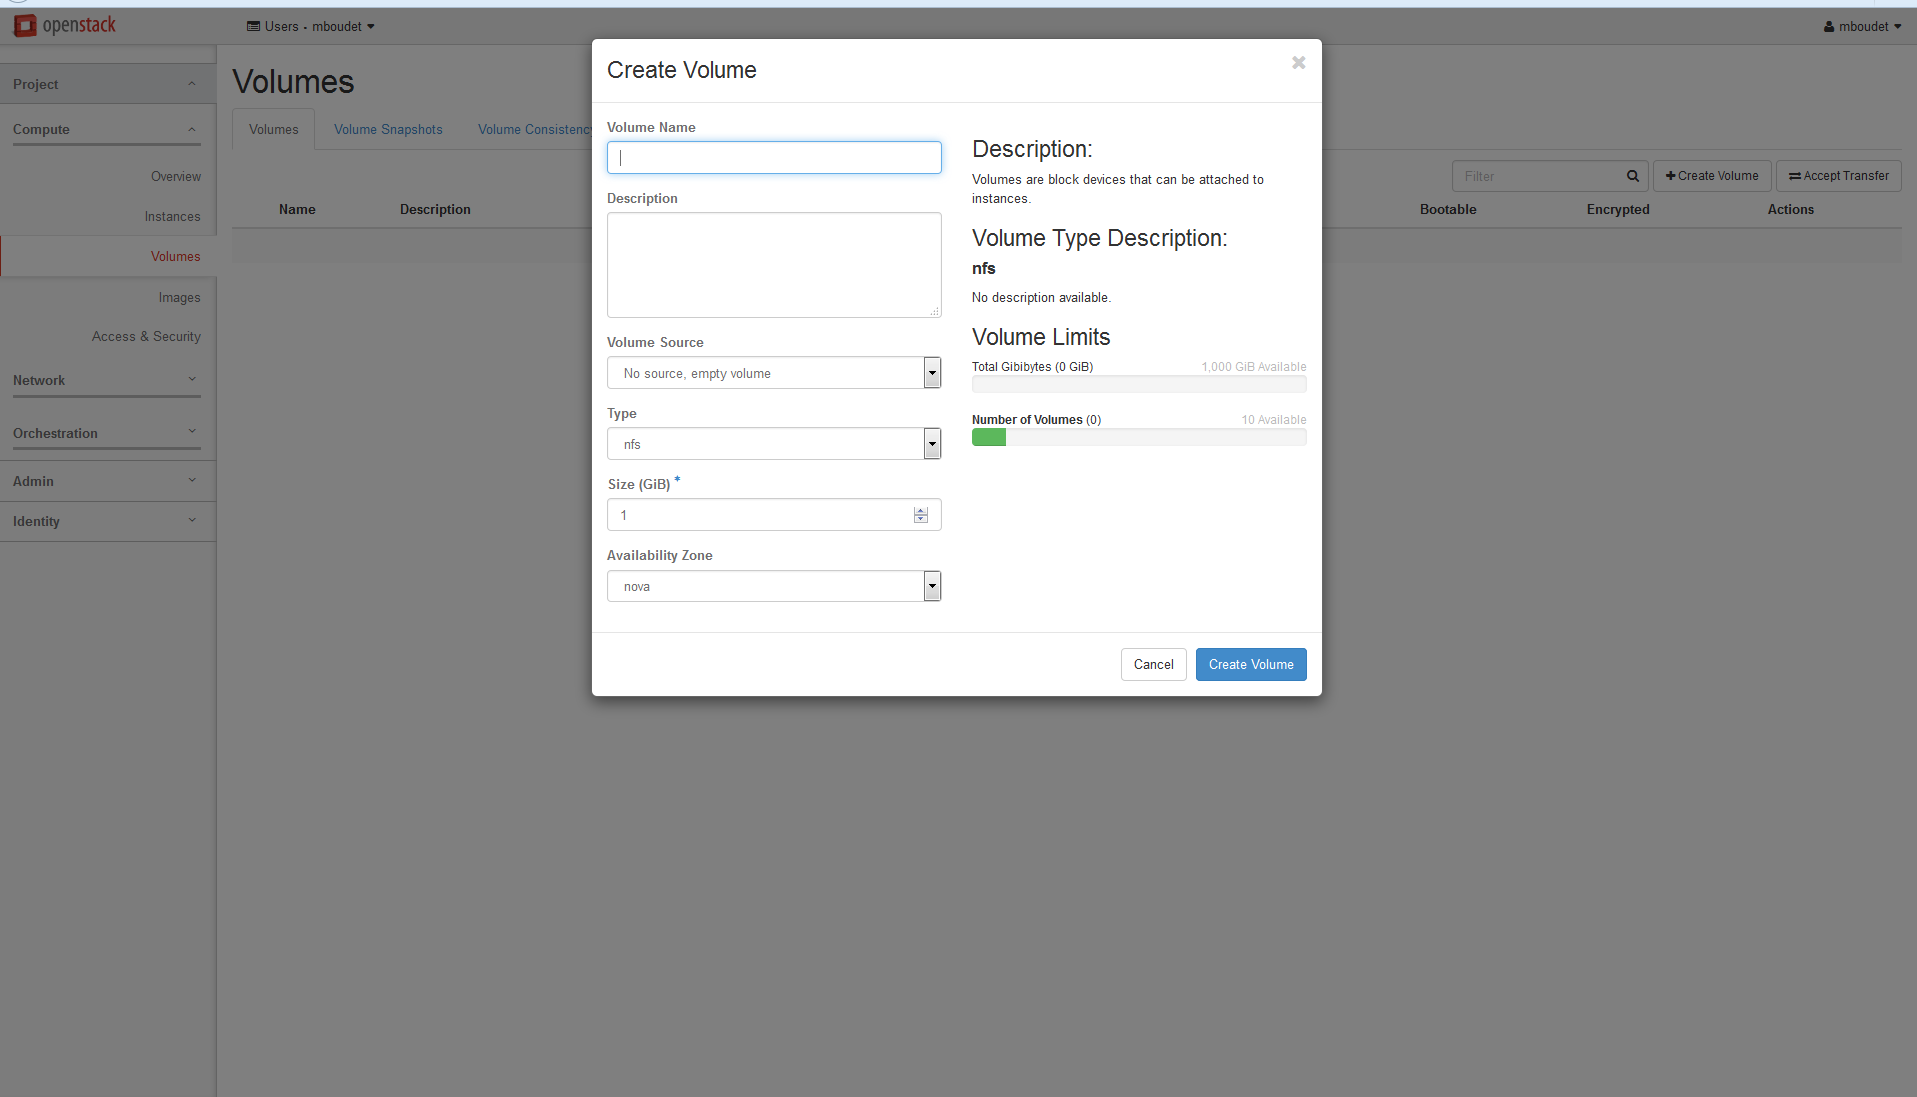
To create a new volume, you need to go to the “Volume” tab. From there, click the “Create volume” button, fill out the name and description, select the size and click “Create volume”.
Your new volume will appears in the “Volumes” tab, ready to be used.
Please use the “ISCSI” format
Attaching a volume to an instance.
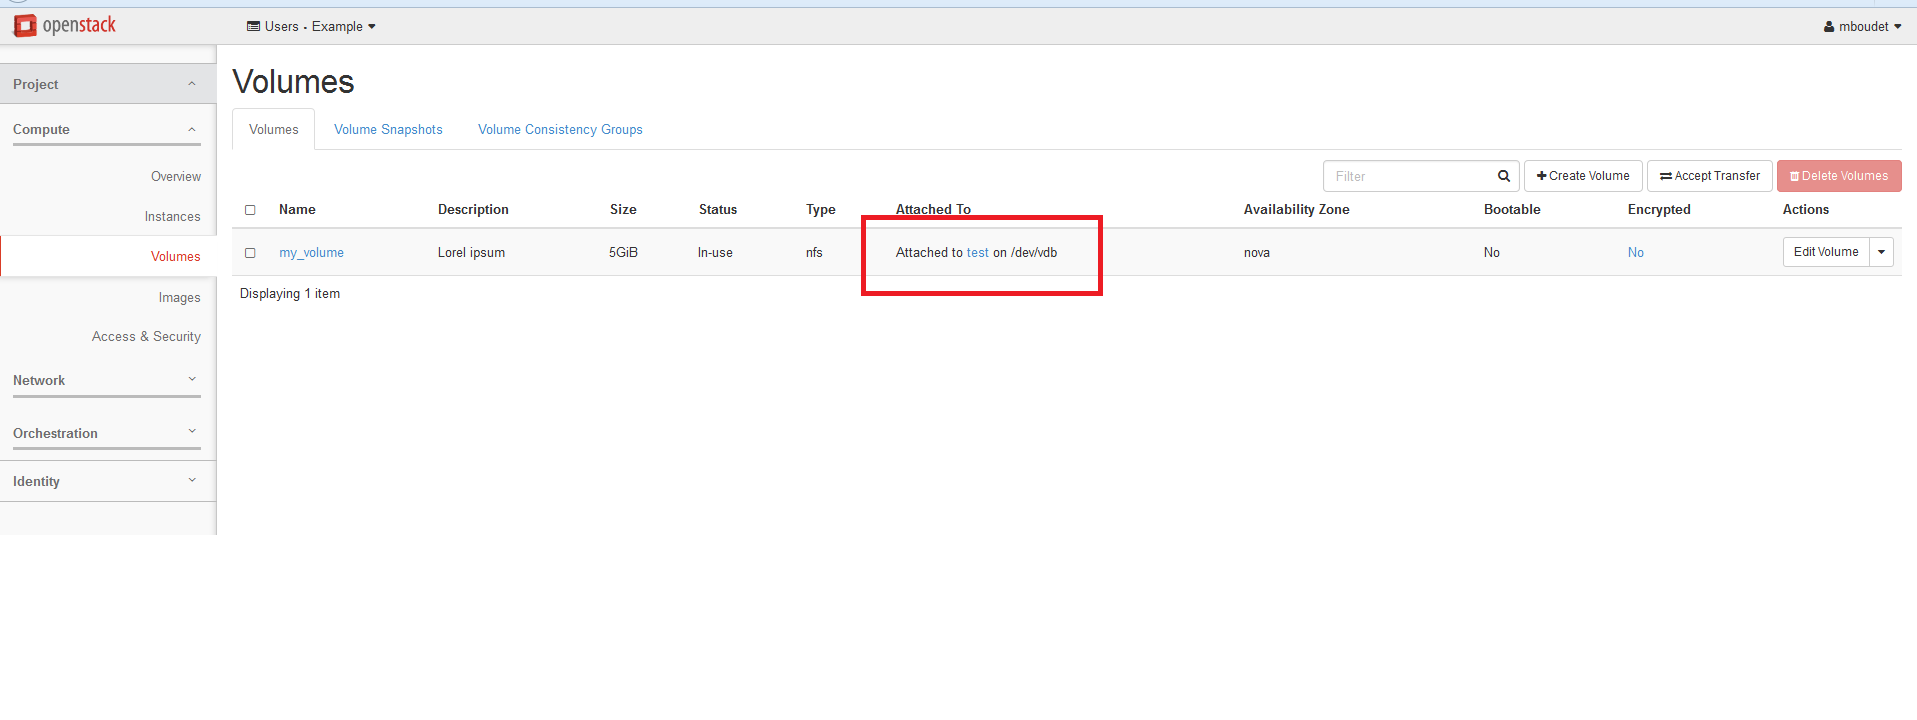
First, you need to create an instance. When it is fully booted, you can attach your volume. To do so, go to the “Volumes” tab, and select “Manage Attachments” for the volume you wish to use. From there, select your instance and attach the volume to it. You will be able to see where the volume is attached on the instance in the “Volumes” tab (Ex: /dev/vdb)
First use
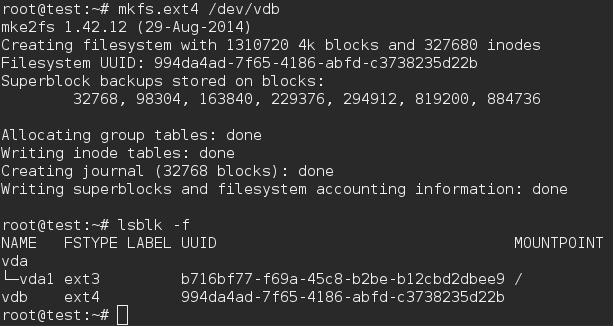
If this is the first time using this volume, you need to create a file system on it. To check if there is already one, using this command:
lsblk -f

If there are none, you need to create it:
mkfs.ext4 /dev/vdb
(with /dev/vdb the path to your volume)
You can then mount the volume anywhere you wish and start storing data.
mkdir /mnt/myfolder
mount /dev/vdb /mnt/myfolder
* If an error occurs, please make sure the package ‘nfs-common’ is installed.*
Subsequent uses
Simply create the folder (if needed) and mount the volume
mkdir /mnt/myfolder
mount /dev/vdb /mnt/myfolder
NB: DO NOT USE mkfs.ext4 AGAIN
Detaching a volume
On your instance, make sure to unmount the volume
umount /dev/vdb
Then, in the Genostack interface, simply head back to the “Volumes” tab and the “Manage Attachments” button. You then need to click the “Detach volume” button.
Instance booting
Overwiew
Openstack allows users to boot a new instance on a volume. Booting an instance on a volume allows you to keep any changes made on the instance, even if you delete and re-create it later on. This allows you to keep working on a instance even after deletion, without any need to make a snapshot.
Booting from a volume
You should begin by creating a bootable volume. The easiest way for this would be to create an instance using an image, and check the “Create New Volume” checkbox. You can then select the volume size (it should be bigger than 20 Go). The bootable volume will be automatically created at instance launch, and will remains after instance deletion. You can access it from the “Volumes” tab. (You can change its name for easier recognition) NB: A bootable volume will behave as a normal volume, meaning you can attach it to an instance as a storage volume
Afterward, you will only need to select your volume in the “Source” tab at instance creation.
Saving an Image to a volume.
If you created a snapshot from an instance without using a volume, you can convert it easily to a bootable volume b going to the “Images” tab, and using the “Create volume” action.
Saving a volume as an image
If you wish to create a new image from one of your bootable volume (for example because of quota issues), simply select the “Upload to image” action on your bootable volume.
Volume operations
Making a copy of a volume
To copy a volume, you can either use the “Create snapshot” button in “Actions”, or create a new volume using the one you wish to copy as the source.
Transfer volume
You can transfer one of your volume (bootable or normal) to another user using the transfer function. NB: You will loose the volume, so make sure to make a copy if you need to keep the data. To do so, use the “Create transfer” action on you volume. (Make sure it is not attached to an instance). You will need to fill out the transfer name. Afterward, you will obtain the Transfer ID and the Authorization Key. Make sure to copy them, or you will have to start again from scratch.
The user you wish to transfer to will need to use the “Accept transfer” in “Volumes”, and fill out the Transfer ID and Authorization Key. He will then be able to access the volume.