Saving your own image
As root, you can install anything on your virtual machine : Databases, web application, software suite, virtual desktop, etc. You also can change the root password and create other users. You might then want to save these changes to a new image.
Cleaning up your instance
If the snapshot is for your private use, you can skip this step. If you wish to share your image with other user, you should “clean it up”, meaning remove all private information on it. Private information include data, but also your history and your ssh key.
You can remove your history using these commands
for logs in `find /var/log -type f`; do > $logs; done
cat /dev/null > ~/.bash_history
history -c
You can clear all ssh keys allowed in the instance using this command:
cat /dev/null > ~/.ssh/authorized_keys
Nb: You will lose access to your instance the next time you disconnect, until the next boot
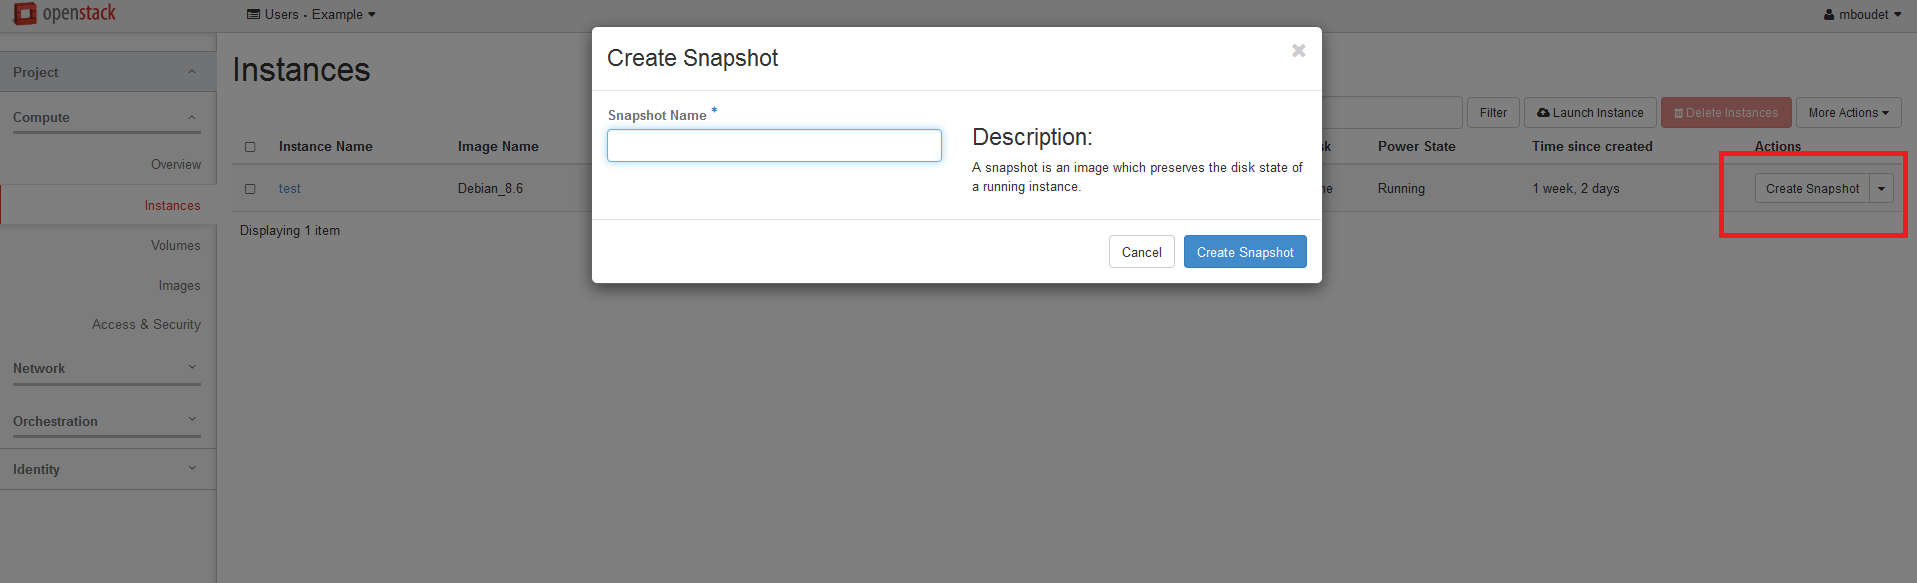
Making a snapshot of your instance:
To make a snapshot of one of your instance, simply head to the Instances and use the Create snapshot button. You will then be prompted for a name, and will be able to snapshot it. NB: The instance will be stopped during the process.
After the process is done, you will be able to use it as a boot source, by selecting Instance snapshot or Volume snapshot in the boot menu.
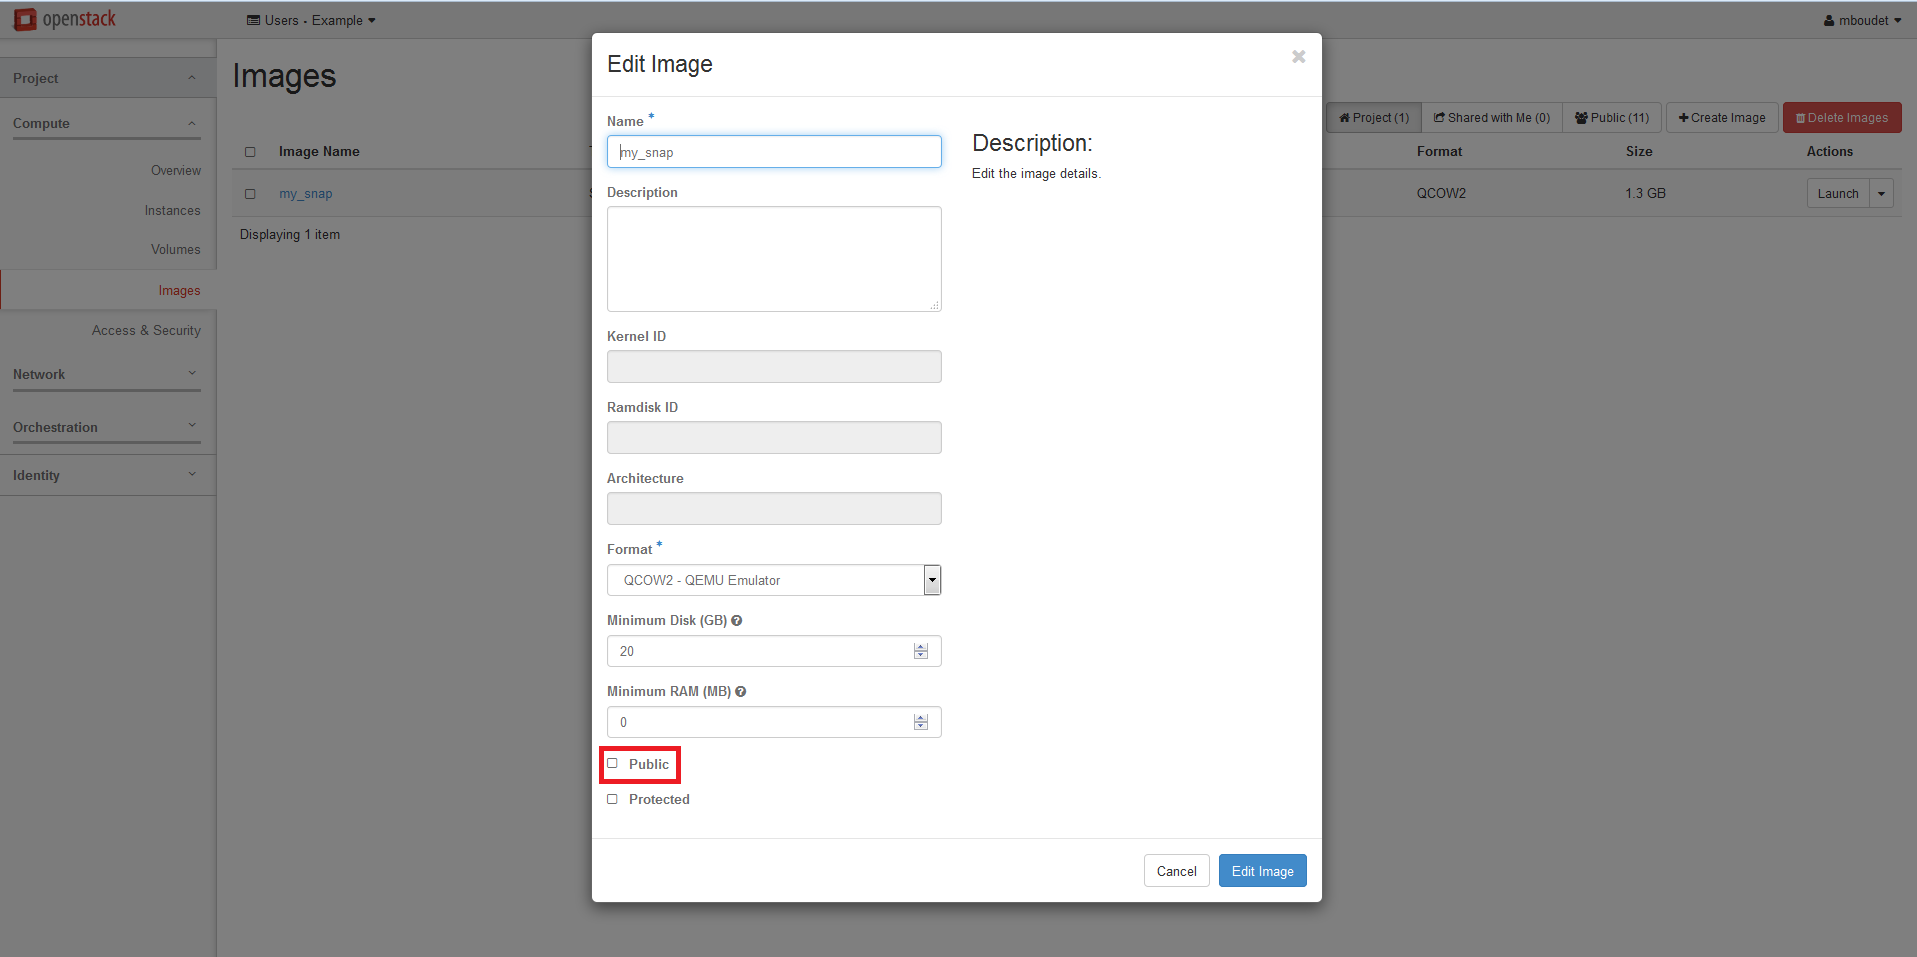
Making the image public
If you wish to share your instance with all users, you can make it public. Simply head to the Image tab, select the “Edit Image” action, and select the “Public” checkbox.
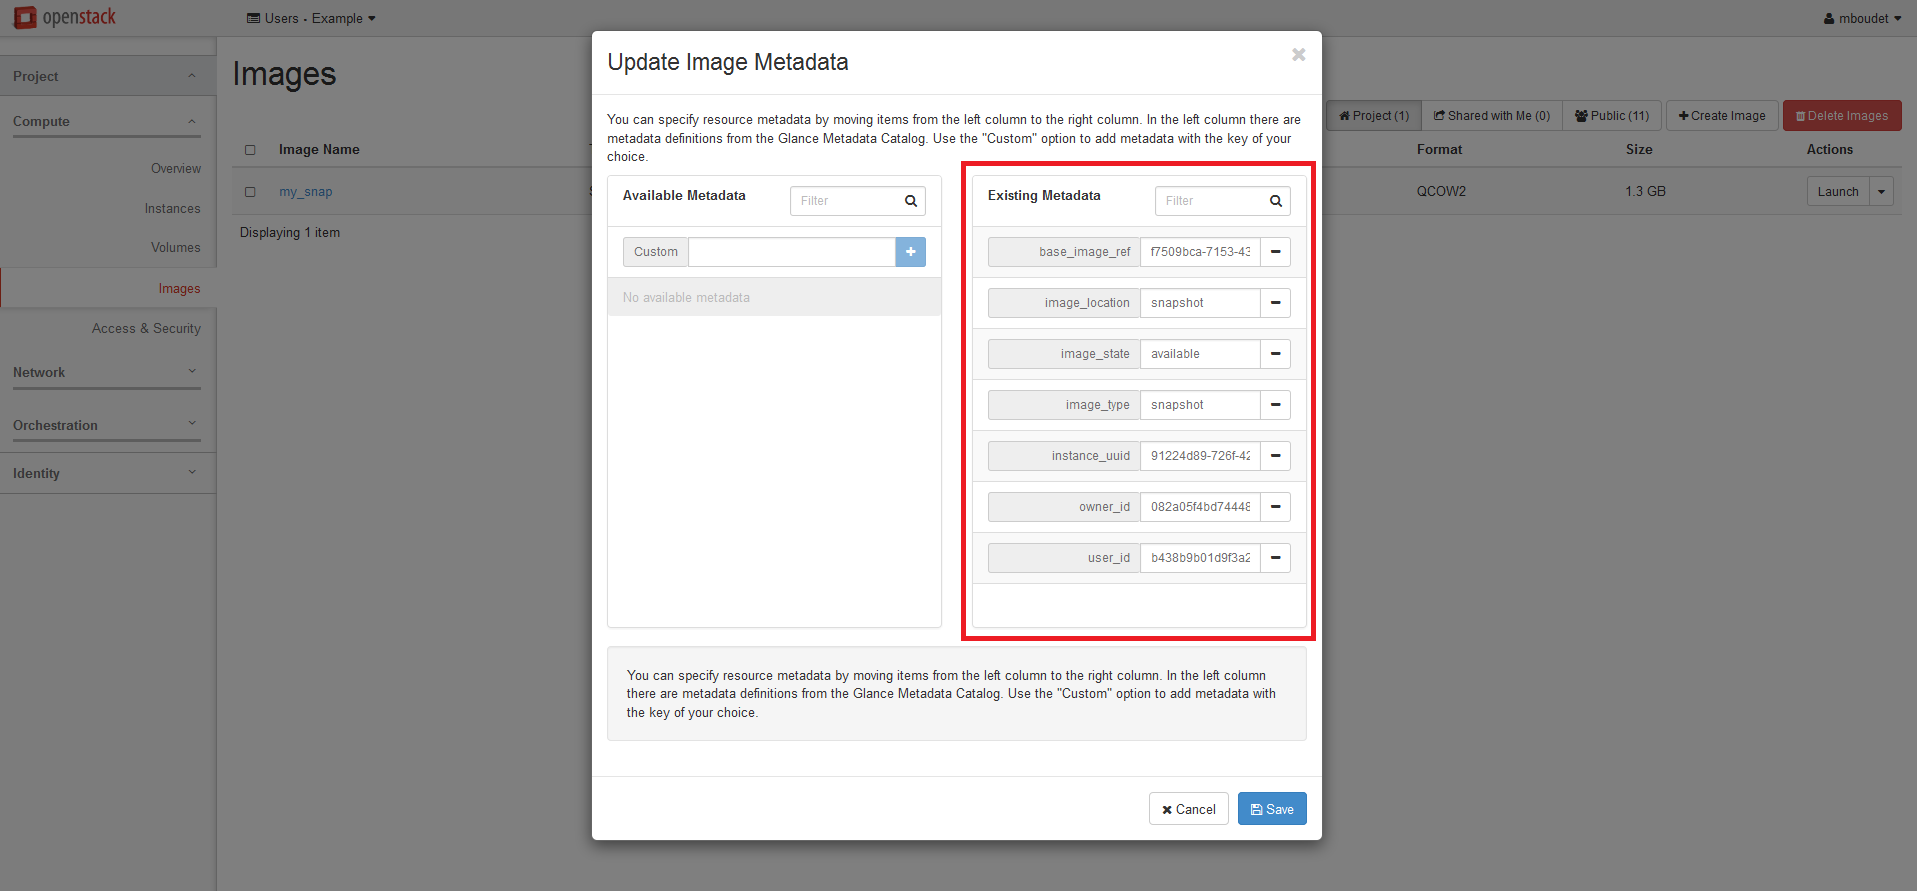
Converting your snapshot to an image
Snapshots and Images are virtually the same. The main difference is the way they are available from the interface. If you wish to convert your snapshot, simply head to the Imagage tab, and select the “Update Metadata” action. You then need to remove all metada from your snapshot.